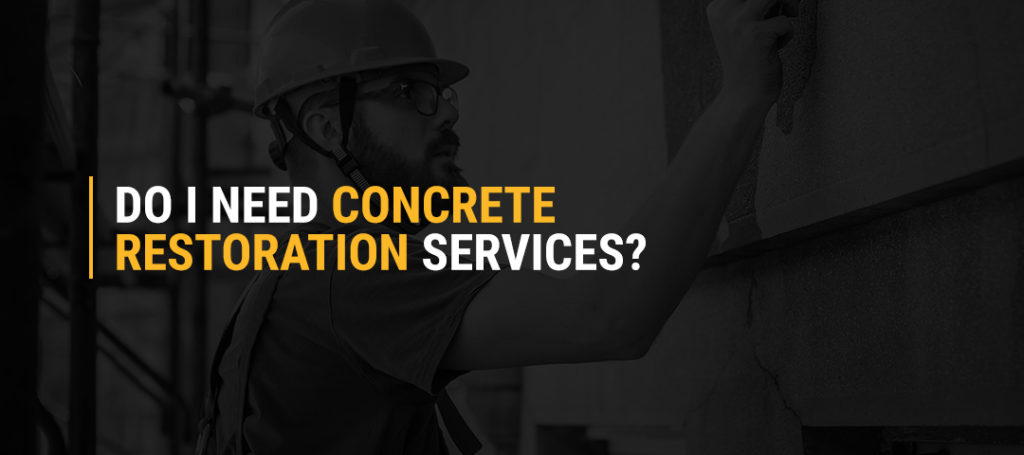
Do I Need Concrete Restoration Services?
Concrete is a strong, versatile material, but it’s not indestructible. Damage and natural wear or erosion break concrete down over time, leaving behind markings and structural changes that become an eyesore or even a safety hazard. When this happens, you typically have three options — repair, replace or restore your concrete structure or surface. Because replacements can be costly and complex, professional repair and restoration should be your first choice for minor and moderate-level damage.
Unlike concrete repair, concrete restoration corrects both damage and appearance. Your concrete restoration contractor will take the necessary steps to return your concrete surface or structure to its former functionality, strength and style, free of cracks, fading, stains or other issues.
Why Is Concrete Restoration Necessary?
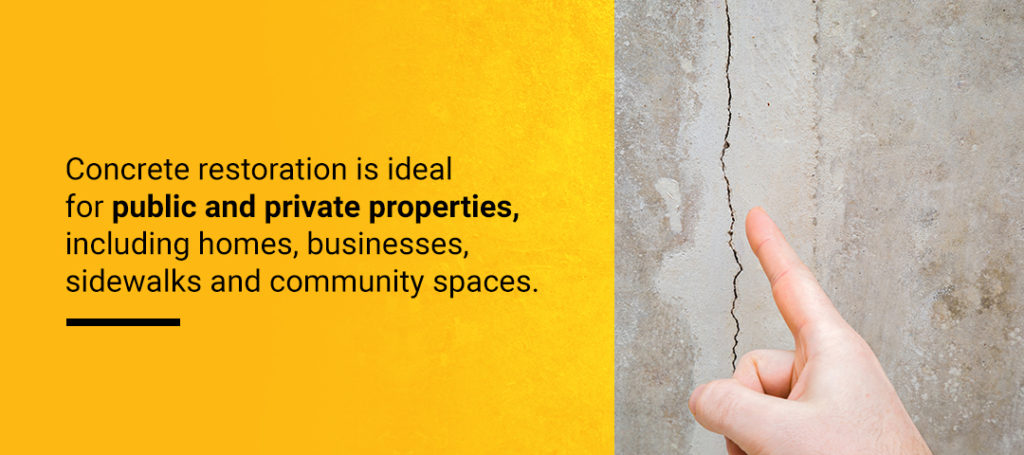
Concrete restoration is ideal for public and private property, including homes, businesses, sidewalks and community spaces. By addressing your concrete concerns early, you may avoid potentially challenging concrete replacement — a complex process that may put your structure or surface out of commission for a few days. Proactive restoration is critical for managing costs and keeping your concrete’s function intact. It’s also the best method for keeping your concrete safe and presentable. Concrete with extensive damage threatens pedestrians and may weaken your structure or platform’s support.
Restored Concrete Extends Longevity
Concrete can last anywhere from 50 to 100 years — sometimes longer — but regular restoration can help extend its lifespan and prevents premature aging or deterioration. Preventive maintenance can address minor cracks, scuffs and buckling before they turn into more significant damages. This longevity is crucial for buildings and structures that rely on concrete supports or foundations. It’s also more cost-efficient to maintain your concrete over time instead of waiting for larger issues to develop — especially when those issues could threaten people, property and connected structures.
Restored Concrete Enhances Safety
Damaged or aging concrete can be hazardous for pedestrians and vehicles in applications like public walkways, patios, driveways and parking garages. It’s especially dangerous when supports or foundations for buildings and structures start deteriorating.
By restoring your concrete, you’re creating a safer environment and minimizing the risk of:
- Slipping: Worn concrete loses its natural traction, which can create slick surfaces for cars and people. Restoration can help revitalize your concrete’s slip-resistance before things like standing water, snow and ice worsen the problem.
- Tripping: Popouts, potholes, cracks, raised edges, holes and chips create an uneven surface that can cause pedestrians to trip. In extreme cases, it can even cause vehicular damage. It also renders the area impassable for wheelchairs, walkers, strollers and other mobility devices that create an equal environment for patrons or employees.
- Instability: Unstable concrete can buckle or become uneven, usually a result of weight overload. This could have devastating results for structural concrete, causing expensive and harmful damage and creating an unsafe environment. Weakened concrete is also more susceptible to impact or erosion.
| Contact Us | Call Us |
Restored Concrete Is More Attractive
For commercial property owners, maintaining a clean, professional appearance is a critical part of managing your building or facility. Over time, concrete may lose its vitality and color from:
- UV fading from sunlight.
- Chemical and acid discoloration.
- Stains and spills from oil, food, and debris.
- Scuffs and tire marks.
- Anti-ice salts near roadways and sidewalks.
Since fading happens at an uneven rate, your concrete may eventually look patchy or become textured in some areas.
Restored Concrete Improves Insulation
Concrete walls, expansion joints, and concrete flooring possess natural thermal resistance that increases your facility’s R-value. Concrete traps heat, so it helps prevent heat loss in buildings. It can also reduce excess indoor moisture that may seep through, creating a more comfortable environment. Low-density concrete tends to have a higher R-value than high density.
These insulating properties are compromised when concrete begins to deteriorate. Once-trapped moisture and air can enter the building, increasing energy costs and decreasing efficiency. If left unrestored, the problem will worsen until it becomes impossible to ignore.
Restored concrete can improve insulation and avoid these complications by ensuring each surface and joint is structurally sound. Regular preventive inspections can help keep them that way.
How Does Concrete Degrade?
Quality concrete provides a stable, durable and supportive surface or enclosure, but many outside factors can cause premature aging and degradation.
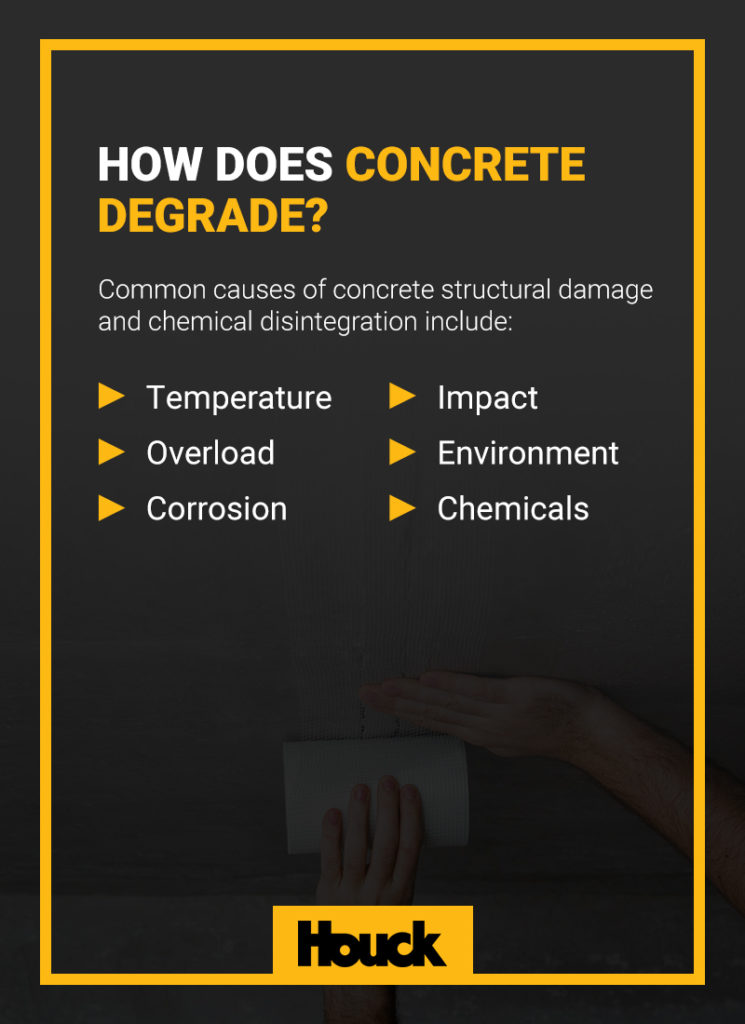
Common causes of concrete structural damage and chemical disintegration include:
- Temperature: Though concrete can withstand high temperatures, extreme hot and cold or constant fluctuating between extreme temperatures wears it down, especially when moisture is involved. As water pools on worn concrete, it can settle in cracks and holes. If the water freezes, it expands up to 9% which can severely weaken the concrete.
- Overload: Overloads caused by excessive weight leads to buckling, warping, cracking and chipping. It’s a significant concern for concrete in structural joints, foundations and high-traffic areas, like parking garages, roadways and pedestrian walkways.
- Corrosion: Natural aging — including fading and general signs of wear — comes from frequent use and exposure. Corrosion happens from repeated elemental exposure, like hydraulic wear, or when embedded materials, like metal, begin to corrode and cause the surrounding concrete to deteriorate with it.
- Impact: Accidental and unnatural damage can degrade concrete quickly — and unexpectedly. Examples include blasting, fires and impact caused by vehicles, machinery or tools. Impact extent can range from minor to severe and lingering after-effects, like open cracks, make the remaining cement vulnerable to more damage if left unrestored.
- Environment: Earthquakes, seismic tremors, saltwater and tornadoes are unpreventable, and even the strongest concrete surfaces and buildings are at risk. These environmental conditions can make concrete become unlevel or cause extreme cracking and shifting that worsens.
Chemicals: De-icing salts, chemical sulfates, industrial waste, food and beverages and acids create chemical reactions when exposed to concrete surfaces. This reaction can cause instability and cosmetic wear, and it weakens the concrete after significant exposure.
| Contact Us | Call Us |
When to Call a Concrete Restoration Contractor
Prompt concrete restoration saves time, money and frustration — but how do you know when it’s time to schedule an appointment? Inspect your concrete structure or surface for the following signs:
- Cracks: Cracks range from thin, hairline markings to large crevices along walls and flooring. Factors like shrinkage and settling cause several types of cracks, and they range in severity. Even minor cracks can create an uneven walking surface or reduce your facility’s energy efficiency. Cracks may give insects and moisture a way into your building as well.
- Discoloration: Discoloration includes stains, faded areas, minor surface corrosion and tire markings that don’t pose a structural threat but diminish your facility’s appearance. Though not as time-sensitive as other types of damage, it doesn’t look as professional as clean, finished concrete.
- Flaking: Flaking is a type of slow chipping that creates a layer of fine, dust-like concrete on top of affected surfaces. This dust is messy and extremely hazardous to inhale when it produces crystalline silica.
Spalling: Spalling is when the concrete’s surface starts breaking off into small or large pieces. It often happens in high-traffic areas, where it creates bumps and uneven surfaces. - Unevenness: Surfaces are usually uneven for one of two reasons — improper installation or concrete deterioration. Either way, uneven and sunken surfaces cause water to pool, creating an unsafe environment when it freezes. This freezing can also initiate the freeze-thaw cycle, which hastens the erosion process. Unlevel concrete surfaces do not offer long-lasting support and may cause extensive damage in structural applications.
- Gaps: Gaps occur between concrete joints and at the edge of sidewalks and patios. Many factors contribute to gapping, including soil erosion or movement, seismic tremors and impact-related damage.
- Energy: If your facility’s energy costs are higher than usual and you’re unsure why it might be time to inspect your concrete surfaces and supports. Compromised insulation will reflect on your utility bill and could create environmental changes, like hot and cold patches through the room.
Never ignore seemingly minor signs of concrete damage. These issues threaten the integrity of your property and may pose a serious threat to employees and pedestrians. They can also worsen quickly, creating more lasting, challenging defacement.
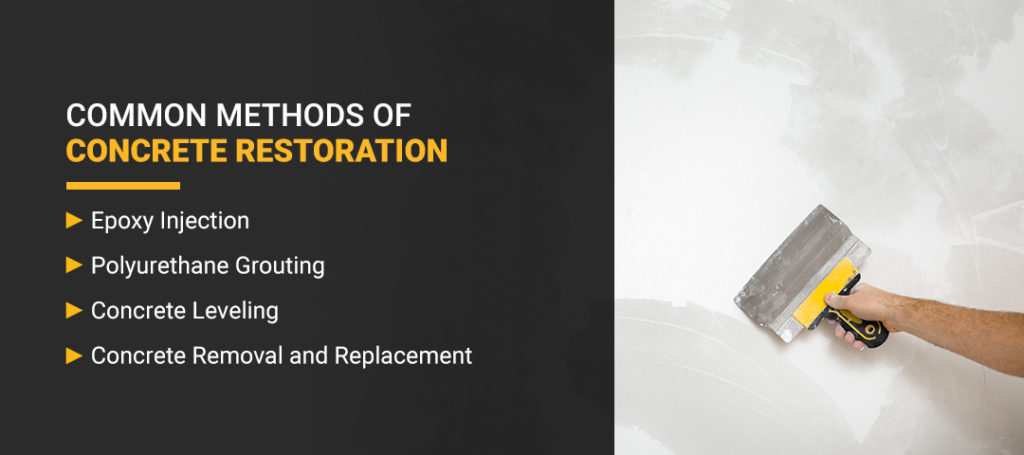
Common Methods of Concrete Restoration
Once you’ve decided concrete restoration is best for your property, your contractor will help you determine which method is suitable for your specific concerns. Four common restoration methods include epoxy injection, polyurethane grouting, leveling and total removal or replacement.
1. Epoxy Injection
Epoxy injections are one method for treating cracks and some gaps. Epoxies create a strong bond that can help a weakened surface continue bearing heavy loads. It’s one of the most minimally invasive and cost-efficient concrete restoration methods available, but there are limitations.
Epoxy injection does not work on moving cracks, and it is not a substitute for correcting whatever caused the crack in the first place. Unless you address the larger issue, you will need additional epoxy injections in the future as cracking continues. Epoxy is also incompatible with moisture, so you must first repair and dry any leaks or high-humidity areas where cracks are present.
2. Polyurethane Grouting
Like epoxy, polyurethane grouting is a restorative resin used for heavy-duty concrete damage. It’s lightweight, fast-acting and minimally invasive, and it’s ideal for challenging or high-traffic applications. Because it’s clean and the cure time is minimal, you can usually resume normal activities shortly after application, assuming you’ve repaired the root cause of the problem.
Unlike epoxy injections, polyurethane grouting can resist wet or dirty conditions without interfering with performance. It is not a structural repair, however, and may not last under extreme tension.
3. Concrete Leveling
Concrete leveling involves raising the surface from underneath when it has started to sink or separate. You might have heard the process called raising, leveling or slabjacking.
Completing the concrete leveling process includes the following steps:
- Drilling holes into the concrete slab or platform to create an opening to the terrain underneath.
- Filling the affected area with polyurethane foam or filler substance — such as limestone and slurry — to even out the concrete’s surface.
- Filing and smoothing the application holes with new concrete.
Concrete leveling is less invasive and more cost-efficient than removal and replacement. It is a good option for property owners who have extensive sloping but do not or cannot invest in removing and replacing the existing concrete.
4. Concrete Removal and Replacement
Total removal and replacement are often the last resort when concrete is damaged beyond repair or restoration. In some cases, replacement may be the more cost-effective, safe or time-saving option if the alternative is several smaller restoration or repair processes.
It’s also the best option if concrete damage is a threat to a building’s structural integrity or when it no longer functions properly. For example, a concrete parking garage floor with multiple large cracks, gaps and sinking is no longer accessible for vehicles and is too far gone for restoration — replacement may be necessary. Do not attempt to remove or replace large-scale concrete without professional assistance.
| Contact Us | Call Us |
Will You Need Concrete Repair or Resurfacing?
Concrete patching, injections and leveling, can address several of your property’s needs. Resurfacing is similar to repairs because the process can correct damages, but instead of individual repairs, it involves removing your concrete’s surface level and pouring fresh in its place.
Resurfacing may be the best option for your property if:
You have multiple concerns on the same concrete surface — i.e., a combination of cracks, gaps, chips and staining.
It would be more cost-effective than multiple surface-level repairs.
When your primary objective is to freshen up the concrete’s appearance.
This process is only effective for top-layer concerns and will not help with deep foundational issues or reoccurring problems, like weathering. A professional contractor can identify the extent of your concrete issues to determine the best course of action. They can also calculate specific costs and advantages to help you make the best choice for your facility and budget.
About Concrete Restoration Services From Houck
Houck can help whether you’re dealing with extensive concrete damage interfering with your daily operations or want to create a more professional appearance for your facility. Concrete rehabilitation from Houck includes repair, restoration or resurfacing for your commercial or industrial property.
Our specialties include expansion joints, epoxy injections and polyurethane grout injections to correct cracks, gaps and natural degradation. We work with clients across Harrisburg, Lancaster, York and the mid-Atlantic region to assess your concrete needs and deliver top results backed by decades of experience and an unwavering commitment to safety.

What to Know About Caulk Removal and Replacement
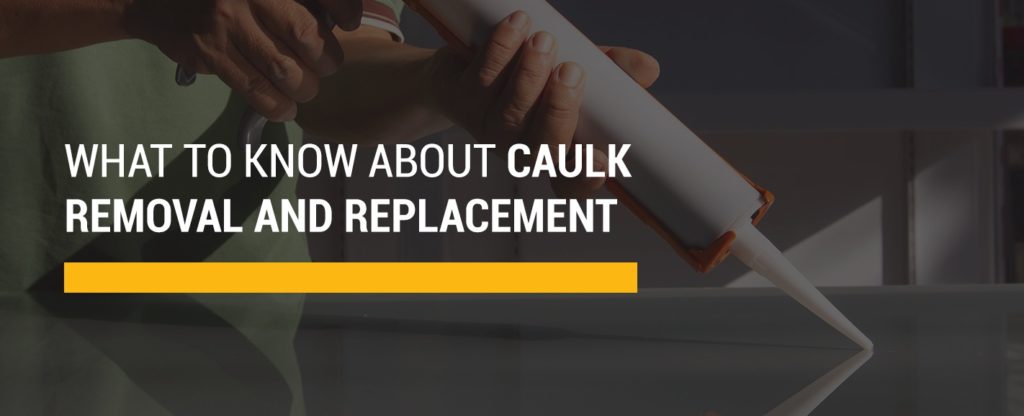
What to Know About Caulk Removal and Replacement
Caulk removal and replacement are some of the simplest ways to improve the quality of a building structure and its energy savings. However, incorrectly removed or applied caulk can cause more problems than it solves. If you have never thought about replacing old caulk around your commercial property, it’s already past the time to complete this chore. Find out what to do to remove the old caulk and replace it with new caulking.
When to Remove Caulking
Caulking does not last forever. With frequent exposure to the elements, it will wear out sooner. If the caulk wasn’t applied by a knowledgeable craftsperson, the surface might not have been prepared appropriately, or the wrong caulk could have been applied. This can lead to premature wear and peeling.
Peeling caulk does not create a tight seal. Water, insects and cold air can all seep through the gap created by worn caulk. Left unchecked, these issues can worsen until the area protected by the caulk sustains serious environmental damage. For instance, a window with caulk around it could receive water damage on its frame, leading to mold and dry rot of wooden frames. Carefully preparing the surface and applying a new caulk with a tight seal can lengthen the caulk’s life span and prevent peeling or cracking.
Mildew or mold growing on caulk indicates the material no longer provides adequate protection from these organic substances. Mold growing on the caulk’s surface could signal that moisture has penetrated under the material, causing mold growth beneath it, too. Mold causes several problems such as allergies and physical damage to structures.
Mold or mildew-covered caulk needs replacement as soon as possible. While waterproof caulk can prevent mold or mildew from growing, it can still allow moisture if a knowledgeable person did not apply it with a tight seal.
If you schedule any building renovations, remove the old caulk and replace it. If your renovations involve replacing doors, windows or flooring, remove the old caulk and have a professional replace the sealant.
Typically, properly applied caulk in an indoor location should last around five years. However, other signs aside from age will indicate you need to remove the caulking and replace it. Even if your caulk does not show indications of wear, invisible damage and stress may compromise its effectiveness over time. Therefore, schedule caulk removal and replacement for at least every five years.
Schedule caulk removal and replacement for your facility with Houck today!
| Contact Us | Call Us |
Does the Type of Caulk Matter?
The type of caulk does matter, especially in how you use it and how you must remove it. For instance, silicone caulk is the toughest type to remove. The following are common types of caulk and their most frequent applications.
Silicone Caulk
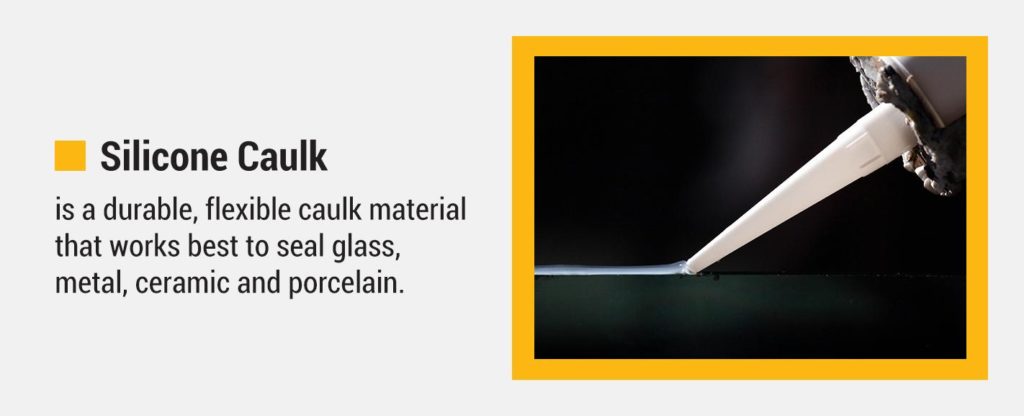
Silicone is a durable, flexible caulk material that works best to seal glass, metal, ceramic and porcelain. It can withstand cold weather, ultraviolet (UV) rays, mold and mildew extremely well, making it ideal for unheated spaces or outdoor applications. For curing, silicone does not require warm conditions, unlike other sealants. After application, the sealant remains soft and pliable.
Unfortunately, silicone will not adhere to wood or dried silicone. You also cannot paint over it because the paint will not adhere to the caulk. Additionally, if something physically damages the silicone to cause a tear in it, the rest of the caulk will also rip away easily.
Despite its shortcomings, silicone remains a top choice for sealing nonporous surfaces in extreme environments.
Water-Based Caulks
Several types of sealant fall into the water-based category — latex, acrylic and vinyl. Water-based caulks adhere to most types of building materials, including nonporous surfaces and wood. These caulks are among the easiest to work with because they only require water for cleanup, as long as the material has not dried. Plus, after curing, you can paint the surface to match the surrounding material. Acrylic has UV resistance and can work well in exterior applications if needed. Plus, this type of water-based sealant does not shrink.
The downsides to water-based sealants include their application methods. Acrylic is more difficult to apply than water-based latex. All sealants in this category require warm, dry conditions for the fastest, most secure curing. Lastly, unlike acrylic, latex tends to shrink and allow water penetration, making it only useable for interior applications.
Polyurethane Caulks
For tough, long-lasting sealants, polyurethane caulks are a good option. Contractors tend to choose this material for caulk due to the wide range of materials it adheres to and its durability. Polyurethane sealants provide a paintable surface that resists abrasion and shearing damage, making these the best option for high-traffic areas.
Despite polyurethane’s durability, though, this material requires careful handling to avoid exposure to its odorous, noxious fumes.
Butyl Sealants
Butyl caulks adhere well to many types of surfaces. However, its strong water resistance works best for exterior applications, such as rain gutters, roof flashing or foundations.
Unfortunately, butyl sealants have a stringy texture that makes application very difficult. Butyl caulks also do not stand up to abrasion as well as polyurethane versions.
Synthetic Rubber Caulks
Solvent-based synthetic rubber caulks have properties similar to those of both water-based and silicone caulks. Like water-based sealants, synthetic rubber types adhere to most types of construction materials. Application conditions can be cold and wet or hot and dry like silicone caulks. However, unlike the other types of caulk, synthetic rubber varieties stretch well after curing. For joints that move frequently, the flexibility of synthetic rubber sealants works best.
The disadvantages of these sealants are their flammability and high volatile organic compound (VOC) amount. Most solvent-based caulks have higher VOCs compared to water-based types. The high volume of VOCs in synthetic rubber caulks makes these sealants unsafe for interior applications.
Contact Houck to learn more about the best caulking solutions for your needs.
| Contact Us | Call Us |
How to Soften Caulk for Removal
While some types of caulk yield to pressure from a putty knife, not all will peel off with such little effort. You may need to use a softening solvent to prepare the caulk for removal, especially for more durable caulk types, such as silicone.
Homemade Caulk Softening Solutions
Some homemade options for softening caulk will work well for soft water-based acrylics or similar sealants. These solutions include using isopropyl alcohol or warming the caulk with a hairdryer. The heat will only work to soften more delicate types of caulk.
Commercial Caulk Remover Formulas
For difficult-to-remove silicone or other caulks, you will need a commercial caulk remover to soften the material. Caulk removers have different formulas that can disintegrate various materials. While some brands may work with all types of caulk, others will only work with water-based latex or silicone types. Read the instructions before finalizing your purchase to make sure you buy the correct remover for your job.
To soften the caulk with one of these preparations, always read all directions first. You will likely need to ventilate the area well to prevent a buildup of noxious fumes during the process. Test a small area with the remover solution to verify it will successfully soften the caulk type and not harm the material surrounding the caulk.
The softener formula you use could require hours to work. Once the softener finishes its portion of the removal process, you will still need some manual work to remove the caulk. However, the caulk will be softer and easier to peel off the surface after softening.
How to Remove Silicone Caulk
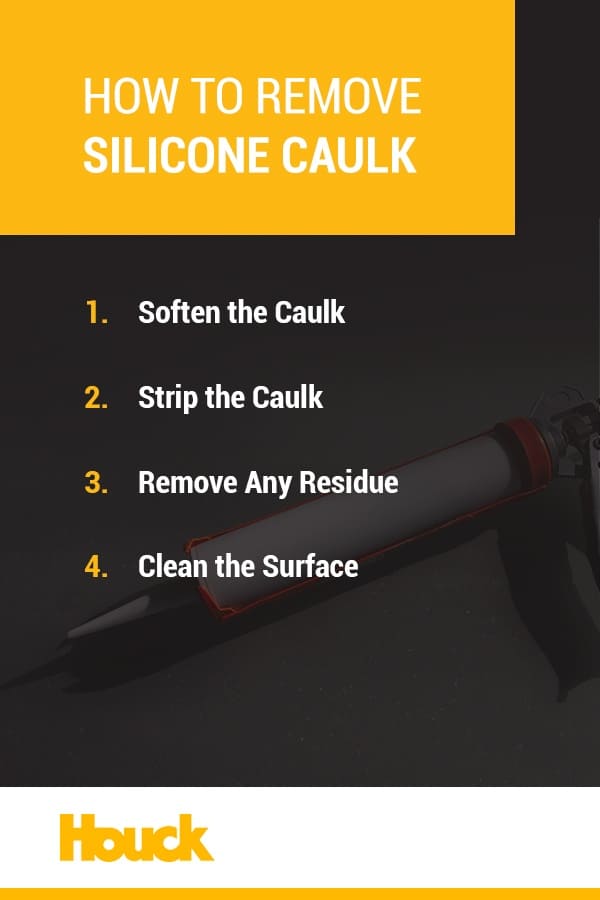
Silicone caulk sticks to surfaces tightly. Therefore, it can be one of the most difficult materials to remove completely. You must have adequate ventilation when removing this or any other type of caulk to avoid inhaling fumes from chemical caulk softeners. Also, you cannot leave any residual caulk in place. Doing so will reduce the new caulk’s ability to adhere to the surface, shortening its life and compromising its performance.
Here are a few steps for getting rid of silicone caulk:
1. Soften the Caulk
First, soften the caulk using either a commercial caulk remover or homemade preparation. Whichever product or method you choose will require several hours to soften the sealant enough for removal. Don’t rush this step. You may need to let the softener work for at least four hours before returning to the removal task. The time you invest will be worth the wait because the softer the sealant becomes, the easier the following steps will be.
2. Strip the Caulk
Use a putty knife, utility knife or a caulk removal tool to peel off the sealant. When using a sharp blade to strip away the caulk, be careful not to scratch the surrounding material. Try to peel the sealant off in strips to avoid leaving behind small pieces. For caulk in tight spaces, you may try a needle-nose plier, too.
If you correctly used the caulk softener product in step one, the sealant should easily peel away in strips instead of shattering into small bits.
3. Remove Any Residue
Get rid of any residue remaining by warming the caulk with a heat gun or hairdryer. For heat-sensitive areas, soak a towel in rubbing alcohol and place it over the caulk remnants for a day or two to soften the last of the caulk. As with the initial softening stage, don’t rush this portion of the caulk removal. You must not leave any residue behind or the new caulk will not adhere well.
Clean off this residue and scrub away any pieces of caulk from corners with a small toothbrush, putty knife, caulk removal tool or utility knife. Since fresh silicone sealant will not adhere to cured silicone, you must ensure a tight seal of the new caulk through proper cleaning.
4. Clean the Surface
After you remove every last bit of sealant, you must still clean off the surface well to prepare it for fresh caulk. Old caulk may have allowed moisture through, causing mildew or mold growth underneath. Clean off the mildew with diluted bleach to kill the organisms and freshen the area.
Get in touch with the experts at Houck for quality caulk removal.
| Contact Us | Call Us |
The Benefits of Professional Caulking and Sealing

While you may remove old caulk and prepare the surface yourself, hire a professional for applying a new sealant. Applying caulk is an art in handling this material. The process is also a science in selecting the appropriate type of sealant for an application. Therefore, for the best results, a trained craftsperson should be the one to apply caulk to your commercial building.
For example, several factors go into determining the correct sealant for a commercial property. Some building locations will need flexible caulking that moves as the joint does, preventing cracks and avoiding damage from shearing forces. Heat and moisture resistance are needed in exterior joint seals. Cleanliness and mold or mildew growth prevention may perform well in a lab or other medical settings with high sterility requirements.
Well-trained craftspeople know which sealant has the properties required to meet a commercial site’s needs. When working with a professional, you’ll get recommendations for long-term performance and repairs of caulk failure points.
Professionally caulked commercial sites have joint seals that keep out pests and moisture. The ability of well-sealed buildings to maintain temperature will also reduce energy usage for heating and cooling. Additional benefits include aesthetic appeal, especially in historic buildings, and prevention of mold and mildew in the area.
A well-sealed building will save money in utility bills and reduced moisture damage repairs. The cost of hiring a professional team for caulking your commercial site will provide returns on your investment in the comfort, durability and longevity of an expertly applied sealant.
Contact Houck for Commercial Caulk Removal and Replacement
For more than 70 years, the craftspeople at Houck have provided caulking services for commercial property restoration and preservation. On every page of our site, you will see testimonials from businesses we have helped with our past services. Their words back up our mission to promote safety first, use a qualified team for each job, exceed all expectations, be flexible when needed and build trusting relationships with our clients.
When you contact us for professional joint sealing services or caulk removal, you get a team of highly trained and qualified craftspeople to properly seal all the joints in the structure. Due to the nature of caulk replacement, attention to detail is vital for a lasting seal. Our team members put diligence into each task they do, including caulk removal and replacement.
We put the same effort into restoring the caulking for small, historic structures and large, modern buildings. We let our years of work in the mid-Atlantic region guide us in our historic restorations. With special training to incorporate modern sealing methods with historic building designs, our team members use the most up-to-date methods to protect these buildings without compromising their historic integrity. Our services also apply to modern properties. No matter your building’s age, if you need professional caulking and sealing services, let us at Houck know.
Reach Out to Us at Houck
To get more information about Houck or schedule a comprehensive estimate for your commercial caulking jobs, contact us today. We look forward to partnering with you to improve your property’s structure through our caulking and other commercial services by providing you with safety, quality and performance.
What to Know About Waterproofing Your Rooftop
During harsh rainstorms, water can accumulate on your roof and seep through roof cracks, damaging your commercial building. As a result, mold and mildew could grow on your walls, and the wooden components of your building can rot. You can prevent moisture damage to your commercial space by waterproofing your rooftop. Whether your roof is flat or sloped, our team at Houck can help you have a high-quality, safe roof with our waterproofing services.
Instead of spending time and money to replace your whole roof, you can apply a waterproof coating to keep water out of the building. Use this roofing and waterproofing guide to keep moisture away from your commercial roof and all its components.
Factors to Consider When Choosing Roof Waterproofing
Though there are several types of waterproofing, you need the best one for your application. Look for the following properties to help you choose the right waterproofing membrane for your commercial roof.
- Compatibility with the existing roof surface: Pay attention to the type of material of the existing coating on your single-ply roof to avoid costly damage. For example, applying urethane over acrylic elastomeric could cause re-emulsification. Any surface with silicone on top would obstruct the adhesion of the waterproofing membrane.
- Resistance to sunlight damage: Unless you have trees above your building, the waterproofing membrane needs to be ultraviolet (UV) stable or resistant. Otherwise, it’ll lose its strength as the sun beats down on it.
- Elongation: The waterproofing membrane on your roof needs to have the ability to stretch to accommodate movement, especially if you have a high-rise or steel building, and cover cracks that may develop over time in the concrete. Manufacturers determine elongation by a percentage. If the material has an extension rate of 150%, it can stretch up to 1.5 times beyond its natural shape.
- Breathability: Waterproofing that’s too effective can trap water inside your building if moisture accidentally leaks through. Look for a membrane that prevents water from passing through it, but allows vapor to leave.
- Resistance to tears: Even if your material has a high elongation percentage, it can tear from a considerable force. Your waterproof membrane should be durable enough to withstand heavy wind and rainwater.
- Resistance to abrasion: Besides tearing by force, the material also needs to withstand wear and tear from everyday use. You could determine a material’s abrasion resistance when workers drop nails, screws and heavy objects on it during construction. If rough objects can rip it, the membrane will bring leaks into your commercial property.
- Chemical stability: The membrane should withstand chemicals from nearby industrial areas and fallen debris. If the membrane isn’t chemically inert, it could break down in the presence of soil and building materials.
- Geometry: The waterproofing membrane needs to have the flexibility to fit around your uniquely shaped roof. A liquid membrane would work best in this case because it can take any form. On the other hand, a sheet membrane can fold and crease, leaving gaps between the membrane and underlay.
Houck is dedicated to safety, quality, and performance. We’re here to keep your facility clean, dry, and safe with superior waterproofing services. Get in touch with us today!
| Contact Us | Call Us |
Common Types of Waterproofing for Your Roof
Maintain and repair your roof to prevent leaks from coming into your commercial space and damaging your property. You can apply a sheet of bituminous material or polyurethane liquid waterproofing. Consider the advantages and drawbacks of each to determine which is best for your roof.
1. Bituminous Membrane Waterproofing
A bituminous membrane sheet made from asphalt with a mixture of sticky organic liquids performs excellently as a waterproofing agent for a low-sloped concrete roof. Manufacturers carefully seal and pack these sheets in a factory, and they arrive on-site in roll form. Read the specifications and safety instructions before you begin the installation process. Since you apply it by torch, you need to consider fire prevention and safety during installation, removing all flammable objects from the site.
During the application process, unfold the bituminous waterproofing membranes and lay them firmly on the surface. You could either use a self-adhesive product or attach the membrane to the surface with a blowtorch. The layer of bituminous waterproof membrane shields against water seepage onto the roof. Then, apply roof tiles and the membrane over the filler material to provide adequate water flow into the drains.
Here are some of the advantages of using bituminous membrane waterproofing.
- Resistance to UV heat: Bituminous membrane waterproofing won’t lose its integrity in warm, sunny climates.
- High elongation percentage: Most membranes must have an elongation of 150% to accommodate structural movements, so it’ll protect your roof, even if cracks develop.
- Excellent flexibility: A sheet made from bitumen is flexible enough to take any shape once laid. Since it has high flexibility, it won’t crack, dent or break in harsh weather.
- Resistance to chemicals: This type of waterproofing won’t deteriorate in the presence of debris or factory chemicals.
- Resistance to punctures and fatigue: Whether a considerable force or heavy objects impact the membrane, it has a high tensile strength to withstand ripping and breaking.
- Excellent breathability: Bituminous membrane waterproofing keeps water and vapor out of your commercial building.
- Cost-effectiveness: The installation of bituminous sheets tends to fit within your commercial budget. Since it lasts a long time, you won’t need to replace it as often.
2. Polyurethane Liquid Membrane Waterproofing
Polyurethane liquid membrane waterproofs your flat roof, especially in unpredictable weather conditions. Craftspeople put this on a roof with a thin coating or primer and top coating using a trowel, roller or spray. Its durability depends on which polymer type the manufacturer uses, but it generally lasts a little longer than a couple of decades. When applying polyurethane liquid to your roof, make sure you wear protective equipment on your hands, eyes, and mouth.
Here are some of the advantages of polyurethane liquid membrane waterproofing.
- Ease of installation: The application process typically takes one day, so you can quickly have a waterproof commercial roof.
- Watertight seal: Polyurethane liquid membrane waterproofing doesn’t create joints, so there’s less room for water to seep through it.
- High elongation percentage: Polyurethane liquid membrane stretches up to 280% to accommodate the building’s natural shifting. High-rise buildings or ones made from steel may shift.
- Excellent flexibility: It’s more flexible than other materials, so it can be more resistant to cracks when the building moves. This material offers a seamless waterproofing membrane. It fills all capillary gaps, decreasing the absorbency and hardening its surface.
Ensure you’re using the best waterproofing solution for your roof. Contact Houck today!
| Contact Us | Call Us |
Materials Used for Waterproofing
Manufacturers use various materials for both bituminous membrane waterproofing and liquid polyurethane.
1. Bituminous Sheets
Bituminous membrane waterproofing comes in a variety of layers. Choose a top surface from one of these materials to protect the membrane from damage.
- Sand: This material installs easily, and it provides a waterproof, chemical-resistant seal on top of the membrane.
- Slates: Using a membrane with this aesthetically pleasing, reliable material will enhance your commercial roof’s visual appeal.
- Talc: Including talc as the top layer of your waterproofing membrane increases its dimensional stability and durability.
- Polyethylene: This material prevents the panel from sticking during storage and transport, but you can also use it as a protective layer.
- Aluminum: Manufacturers typically install strands of aluminum in a bituminous membrane to seal penetrations and provide optimal waterproofing for your commercial roof.
The next layer, the polymer-bitumen compound, usually consists of one of these materials.
- Atactic Poly Propylene (APP): APP Modified Bitumen is a plastomeric waterproofing material that contains a mixture of bitumen and selected polymers, resulting in excellent UV and heat resistance and waterproofing properties once you torch it onto the roof.
- Styrene-Butadiene-Styrene (SBS): SBS Modified Bitumen is a plastomeric waterproofing membrane that protects concrete surfaces from moisture damage. This membrane is impermeable to water and very flexible around uniquely shaped roofs.
The next layer of bituminous membrane waterproofing is its reinforcement, made from one of these materials.
- Fiberglass: A dimensionally stable reinforcement core of non-woven fiberglass can protect concrete surfaces from water damage, especially in warm, tropical regions.
- Polyester: This material has a high elongation percentage and provides optimal strength to the membrane. Polyester resists thermal shock, fatigue and punctures.
2. Polyurethane Liquids
The components of a polyurethane liquid waterproofing membrane depend on the number of layers. Review these common materials to find the most efficient application for your roof.
- Water-based liquid membranes: This health-friendly, energy-efficient membrane provides excellent UV stability and easy application, especially if your building is in a moderate or warm climate.
- One-component polyurethane liquid membranes: Polyurethane’s flexibility in low temperatures and its ability to cure in various conditions allows you to use it in your location. This material saves time during the installation process.
- Two-component polyurethane liquid membranes: You can apply this material with a two-component spray machine for efficient installation if you have a large roof. It dries and cures rapidly, so you can resume activity in your business space.
Steps in a Rooftop Waterproofing Project
We’ve compiled a list of steps for your applying a waterproofing membrane to your roof. Houck provides commercial waterproofing services to make the process easier. Follow these steps for using a liquid membrane for your flat commercial roof.
- Clean out the substrate: Cleaning the surface allows a liquid applied membrane to adhere well. Pressure-wash the substrate to clean it and remove debris, dust or grease that could compromise the adhesion. You can also inspect the roof for blemishes that affect its resistance to water damage.
- Prime the surface: Apply a primer to the surface to enhance the membrane’s adhesion. Primers can also prevent the bituminous oils from bleeding through to the membrane. Before the craftsperson applies the primer, they make sure the surface is dry. To speed up the drying process, they might use torches or an air blower.
- Treat the roof’s details: You must treat all components before applying the liquid membrane. These details include the interior and exterior corners, wall-to-floor corners, metal flashing terminations and penetrations — such as pipes, vents and drains. Embed reinforcing fabric into the liquid membrane, or use a flashing-grade sealant. Make sure you cure the materials before applying the coat of treatment.
- Apply the liquid membrane: Some liquid membranes need fabric reinforcing mats underneath before installation. The application, substrate porosity, temperature and waste affect the liquid membrane’s consumption rate. You might want to apply granules if you live in a warm climate, because they can keep your building cooler.
- Inspect the roof: In most projects, a craftsperson needs to inspect the application at each phase. They’ll check the primer’s coverage, the pull-out and mock-up, the detail treatments and the applied coating millage. They must consider the wet film thickness during application to ensure they use the right amount.
If you choose to use a bituminous waterproofing membrane instead, you can follow this procedure.
- Prepare the roof surface: Clean and dry the top of your roof before applying the membrane. You must install it in pleasant, warm weather, considering your roof’s slope so that water doesn’t flow to the joint lap edge.
- Connect your torch equipment: The hose of your blowtorch should be in good condition. Use soapy water to ensure no gas leakage. When using the blowtorch, set it at the lowest possible setting to avoid sudden flames.
- Align your bituminous rolls: As you apply the sheets to your roof, avoid wrinkling the material, and align them properly.
- Install the membrane: Apply the torch fire uniformly and slowly over the roll as you lay it.
- Inspect the joints between the sheets: Ensure the joints properly adhere to the end laps of the membrane to prevent air gaps. If there are any spaces, lift the sheets, heat them with the torch and reseal them.
Take your next step and choose Houck for quality roof waterproofing services. Get in touch with us!
| Contact Us | Call Us |
Roof Drain Overflow Code Requirements
When waterproofing your roof, you need to follow drainage and ponding codes to prevent damage. It could become damaged if you don’t have enough drainage to get the water away from the building. Consider these regulations from the International Institute of Building Enclosure Consultants as you approach waterproofing.
- Section 1503.4 — Roof drainage: This code indicates that you need to design and install your roof drainage system in compliance with Section 1503 and Sections 1106 and 1108 of the International Plumbing Code. Section 1106 refers to the regulations for the size of conductors, leaders and storm drains, while Section 1108 provides rules for the presence of secondary, or emergency, roof drains.
- Section 1503.4.1 — Secondary, or emergency overflow, drains or scuppers: If your roof requires an updated draining system, you should install a secondary roof drain or scupper. You would need this application if the roof’s perimeter construction extends above it, and the primary drain traps water and allows buildup. Adding this system will prevent the top of the building from collapsing during harsh rainstorms. Like the primary drainage system, your emergency overflow drain needs to comply with Sections 1106 and 1108 of the International Plumbing Code.
- Section 1503.4.2 — Scuppers: You can install scuppers on the roof to allow water to flow out of parapet walls or gravel stops on built-up or flat roofs. If you use these components for secondary roof drainage, size their roof drainage, inlet elevation, quantity and location to keep the water from accumulating above the level outlined in Section 1611.1. Scuppers must have a maximum dimension of four inches.
- Section 1611.1 — Design rain loads: Design each part of the roof to hold the weight of rainwater that accumulates if the primary drainage system has a blockage or the uniform load rises above the secondary drainage system’s inlet.
Houck Can Waterproof Your Commercial Roof
Schedule your next waterproof roofing project in Central Pennsylvania with Houck. Our craftspeople specialize in making your commercial building safer. With more than 70 years’ experience, we know the right waterproofing materials. Contact us online or call 800-458-2122 for a comprehensive estimate.
Re-Roofing Versus Roof Replacements

Is your roof nearing the end of its life? Whether you notice signs of wear in your commercial roof or know it is nearing the end of its warranty, you might be wondering if it’s time for a replacement. If your roof is in good condition, you have the option to re-roof the existing roof rather than tear it off and install a new one. If your roof uses shingles or a protective industrial membrane, you can add a second layer of the material directly on top of the existing roof. You’ll add years to your roof’s life expectancy for a fraction of the cost of a full replacement.
This guide will explain the difference between re-roofing and roof replacements, and help you determine which option will be best for your roof.
What Is Re-Roofing?
Re-roofing is an alternative to completely removing and replacing a roof. When re-roofing is employed, a second layer of shingles is placed on top of an existing roof. While not always possible, re-roofing can help you save on replacement costs. Since the existing roof does not need to be torn off, there’s less labor and time involved. The process is also called recovering since the existing roof is covered with an additional layer.
Another critical benefit of re-roofing is significant savings on materials. To understand just how much you save, consider how many layers comprise your roof.
Flat and low-pitched roofs usually consist of three layers.
- Weatherproofing: All roofs need at least one layer of weatherproofing to keep out moisture. Areas in colder regions might also need an ice-protective barrier.
- Reinforcement: Another layer adds durability, puncture-resistance and structural stability to the roof.
- Surfacing: A top layer protects the two bottom layers from the weather and sun. The surfacing can add additional benefits, such as fireproofing or energy-efficient solar reflective coatings.
A commercial pitched roof typically consists of four layers.
- Decking: Also called sheathing, this bottom layer of the roof is usually a panel of plywood that acts as a foundation for the roof.
- Ice and water barrier: Self-sealing and waterproof, the ice and water membrane protects your building from water penetration and ice build-up.
- Underlayment: A uniform layer of felt protects against water infiltration under the shingles, and allows the shingles to lay flatter.
- Shingles: Asphalt shingles, metal panels or wood shakes are the recognizable outer layer of your roof. They provide architectural aesthetics as well as protection. Asphalt shingles will also have a fifth layer, called a ridge cap. The ridge cap is an extra-long shingle that fits over the vertices of the roof.
The factor that makes re-roofing cost-effective is that most of the layers of the roof stay intact. You do not invest in a whole new roof. Instead, you rely on its existing layers to provide structure and protection for your building. Re-roofing offers significant cost savings since you are reusing these materials. It also keeps your building protected during the roof installation process, since these protective layers stay intact.
Since roofs have many layers, it is difficult to inspect them during the recovering process. If there’s any underlying damage to these layers, a re-roofing will not resolve the issue. Tearing out the shingles and the other protective barriers of the roof allow for the installation of new materials that will last for years to come.
| Contact Us | Call Us |
What Is a Roof Replacement?
Recovering the existing roof is sometimes not possible. If a roof already has a second layer, you cannot add a third layer. The 2018 International Building Code (IBC) 1511.3.1.1 prohibits re-roofing when the existing roof has two or more applications of any roof covering. A roofer cannot recover a clay, slate, cement or asbestos-cement roof. Re-roofing is not possible when the current roof is water-soaked or has significant structural damage. If an inspection reveals the roof has compromised integrity, you should opt for a roof replacement instead.
Unlike re-roofing, a roof replacement tears out the existing roof and replaces it. The waterproofing and underlayment layers are removed and replaced with new material. Tearing out the shingles and underlayment lets roofers inspect the decking. If the decking is intact, new water barriers, underlayment and shingles are applied. If the decking has damage, it will be repaired before the new roof is installed.
A roof replacement is always possible and recommended in any case where a roof has more than a few small issues. Rather than covering up the damage, a new roof gives you structurally-sound, long-lasting handiwork. A new roof also comes with a warranty. Depending on the materials used, it will last between 10 and 50 years. A roof replacement doesn’t have the same material restrictions as recovering, so you gain flexibility.
A roof replacement is a significant investment. It costs more in labor, materials and time than re-roofing. With new materials, your building will have added protection and longer-lasting materials. You don’t have to question whether your roof is sound, because any issues are dealt with during replacement.

How Often Should You Replace Your Roof?
How many years your roof is designed to last depends on the type of roof you have. On an industrial flat roof, the roofing system protective layers you use can impact its lifespan. The materials used on a pitched roof will also have a different life expectancy. Weather damage, frequency of maintenance, slope and mistakes in installation can all influence how long your roof lasts.
Here’s how long your industrial roof can last, depending on the materials used:
- Thermoplastic polyolefin (TPO): A type of single-ply roof membrane, TPO is popular for low-slope roofs. It’s a material known for high durability and extreme weather resistance. Protections from heat aging and UV degradation contribute even further to its longevity. The typical life expectancy is 22 to 30 years.
- Ethylene Propylene Diene Monome (EPDM): An EPDM roofing system features a rubber membrane, which increases longevity. The rubber layer is durable and resistant to impacts, sun and heat damage. It can be installed over an existing roof, so it’s ideal for re-roofing. Rubber roofs are known to last between 22 and 35 years.
- Polyvinyl chloride (PVC): Like TPO, a PVC roof is another kind of single-ply white protective roofing layer. It’s an energy-efficient roofing option since the color retains less heat. It’s also a fire-retardant material, known for its self-extinguishing abilities. While PVC roofs can last between 20 and 30 years, their life expectancy can increase due to the decreased effects of fire damage.
- Metal roofing systems or metal paneling: Metal roofs withstand water and air penetration. Metal roofs are easily retrofitted over an existing roof. They need little maintenance and can prolong the life of your roof. They can last between 30 and 45 years.
- Asphalt roofing systems: Modified bitumen and built-up roofs both use asphalt as an adhesive. Slopped roofs often use asphalt shingles, which have a long lifespan with proper maintenance. An asphalt roof can last anywhere between 20 and 40 years.
While a material’s projected lifespan is a critical factor in determining when it’s time for a replacement, there are lots of other signs. While a roof that leaks in a few spots can be fixed with a roof recovering, significant damage means it is time to replace the roof. Here are some signs of damage to look for:
- Leaking or water damage
- Missing shingles
- Sagging in the roof deck
- Visible holes
- Dark spots
- Mold, rot or moisture
| Contact Us | Call Us |
When Is Re-Roofing a Good Idea?
There are many circumstances where re-roofing can be a cost-saving solution. An ideal candidate for re-roofing is a roof that is nearing the end of its lifespan but is still in great shape. A roof under 15 years old with a minor issue in one area might be better off with a repair than a total recovering. Re-roofing only part of a roof will look uneven.
If a roof is 15 years or older and starting to see signs of minor wear, it’s possible re-roofing will be a helpful solution. If you find granules from asphalt shingles in the gutters, a new layer could be the perfect solution. A few minor leaks or issues can also be resolved with a recovering. Both pitched and flat roofs should not have more than one roofing application. So, if the roof has not been re-roofed before, it is also a strong contender.
Before you can be certain re-roofing is a good idea, you should have an experienced roofer check it. A licensed roofing contractor will need to walk on the roof and inspect the construction. Even a seasoned professional cannot approve a re-roofing job from the ground. By peeling back some of the shingles, a professional can see if there are already two layers. The inspector will also walk around to see if the roof feels soft underfoot and look for deterioration in the flashing.

Re-Roofing Versus Roof Replacement — What’s the Right Choice for You?
Deciding whether to re-roof or replace your roof starts with a roof inspection. While you can choose to replace a roof by inspecting it from the ground, you cannot make a safe decision to re-roof without examining the construction closely. When you have the roof replaced, all the material is torn off and inspected on-the-job. A decision about whether to replace the decking can be made after examining it first hand. The inspection will require a roofing professional to walk on the roof and feel for damage on foot.
Before you decide to have a roof inspected for re-roofing, you must answer several questions about your roof.
How Many Layers Are on the Roof?
Depending on the material used in your commercial building roof, you have a limit on how many layers your roof can have. A metal roof can be retrofitted onto an existing roof as the second layer. If the original construction of the roof is metal, you cannot safely add a second layer. A roof with asphalt shingles can withstand two layers before total replacement becomes necessary. Flat roofs with either an EPDM or TPO membrane can be re-roofed with one additional layer. If your roof has already been re-roofed or is a metal roof, you can rule out re-roofing as an option.
Is the Existing Roof Smooth?
An issue that arises particularly with asphalt shingles is the surface becoming uneven over time. Shingles can start to curl or loosen with time. If a roof is missing shingles or has significant portions of curled shingles, recovering the roof will not be possible. Putting new shingles over old ones requires a flat, even surface. Covering an uneven roof with a fresh surface material will look unprofessional. It also has more potential for water leakage and other problems.

Are You Experiencing Any Leaks, Ice Dams or Condensation Issues?
| Contact Us | Call Us |
What Is the Expected Lifespan of Your Roof?

Discover Professional Roofing Solutions From Houck
At Houck, we specialize in specialty restoration and preservation projects. Our roofing maintenance and repair services cover a variety of challenging roofing jobs. Whether your commercial building has a steep slope or a flat roof, we can provide the expertise and quality you need to extend the life of your roof. We can help you determine if you need a roof replacement or if you can safely re-roof for a longer-lasting exterior. We also provide custom metal roofing systems, coatings and preventative maintenance services. Houck is your choice, from floor to roof.
Dial 800-458-2122 or contact us online to speak to a Houck roofing expert, and see how we can get to work for you.
Houck Group, Inc. Announces the Acquisition of Progressive Services Incorporated’s Business Assets
Houck Group, Inc. has announced the acquisition of the business assets of Dover-based Progressive Services, Inc. (PSI) to enhance its roofing and roof maintenance capabilities. Houck will employ PSI’s people and acquire their business assets, and the business will operate under the Houck brand.
Houck, founded in 1947 by Lawrence E. Houck, began as small, masonry contracting business. Lawrence’s son, Gary L. Houck, assumed leadership in 1970 and ownership in 1980. Under Gary’s leadership, the company expanded its capabilities to include commercial, industrial and institutional masonry restoration, caulking/joint system repairs, waterproofing and protective coatings, concrete rehabilitation, industrial welding, fabrication and installation, flooring, roofing, and roof maintenance.
Houck’s roofing division offers a wide variety of roofing systems, including EPDM, TPO, single-ply, built-up, modified, garden and patio systems, metal, copper, slate and shingles. With the addition of the PSI resources, Houck will increase its structural and architectural metal applications.
The business, now operated by CEO, Gary, and President/COO, Lin Sensenig, has been honored with many local and national awards over the years for their craftsmanship, commitment to safety and their contributions to the industry and community. The culture of “Safety First” is fundamental to their success. Houck makes a continual, conscientious effort to protect its team and maintain a safe environment for all involved.
Gary and Lin are excited about the acquisition as it will not only strengthen and expand Houck’s service offerings to building owners and facility and property managers in Central PA, but also across the mid-Atlantic region. Houck’s constant mission is to be “The Choice… from floor to roof” – to its clients, vendors and employees. Both Houck and PSI have strong reputations for standing behind the quality of their workmanship. Houck’s goal is to exceed expectations. The purchase of PSI, whose mission falls directly in line with Houck’s commitment to performing with honor, humility and humor, will serve to strengthen the mission and contribute to the company’s growth.
“Houck has always been a family-oriented company, and we’re thrilled to be adding the folks from PSI to our family,” said Matthew Moul, Vice President of Houck’s roofing division. Matt will be facilitating the conversion process – which includes the handling of client and employee transition. He shared that they expect the onboarding process to be completed by October 1, 2020.
More information about the building envelope preservation solutions provided by Houck can be found at the company website: https://www.houcks.com/
Contact info:
Bethany Tesché
Houck
7464 Linglestown Road, Harrisburg, PA 17112
717-657-3302 ext. 228